

On publishing my first python package to PyPI
lessons learnt and notes for future reference


How it all started
Many developers use services like coveralls.io or codecov.io for test coverage analysis and reporting. These services are free for open source projects, but require a monthly subscription for private repos. Many times, we work on private repos, and we wanna be able to automatically have coverage badges in our READMEs. What if you are unable to pay such subscription fees, or maybe you don't want to use a SaaS? Your solution becomes to generate your own badge!
Now, there are so many excellent coverage badge generation tools out there, but I couldn't find one to suit my needs. All the existing python tools (for example, coverage-badge) I had come across ended at generating SVG/PNG files/strings/Base64 images. What you do with this remains entirely up to you. Having used istanbul-badges-readme on Javascript projects, I wanted a python alternative but couldn't find anything, so I decided to write one myself!
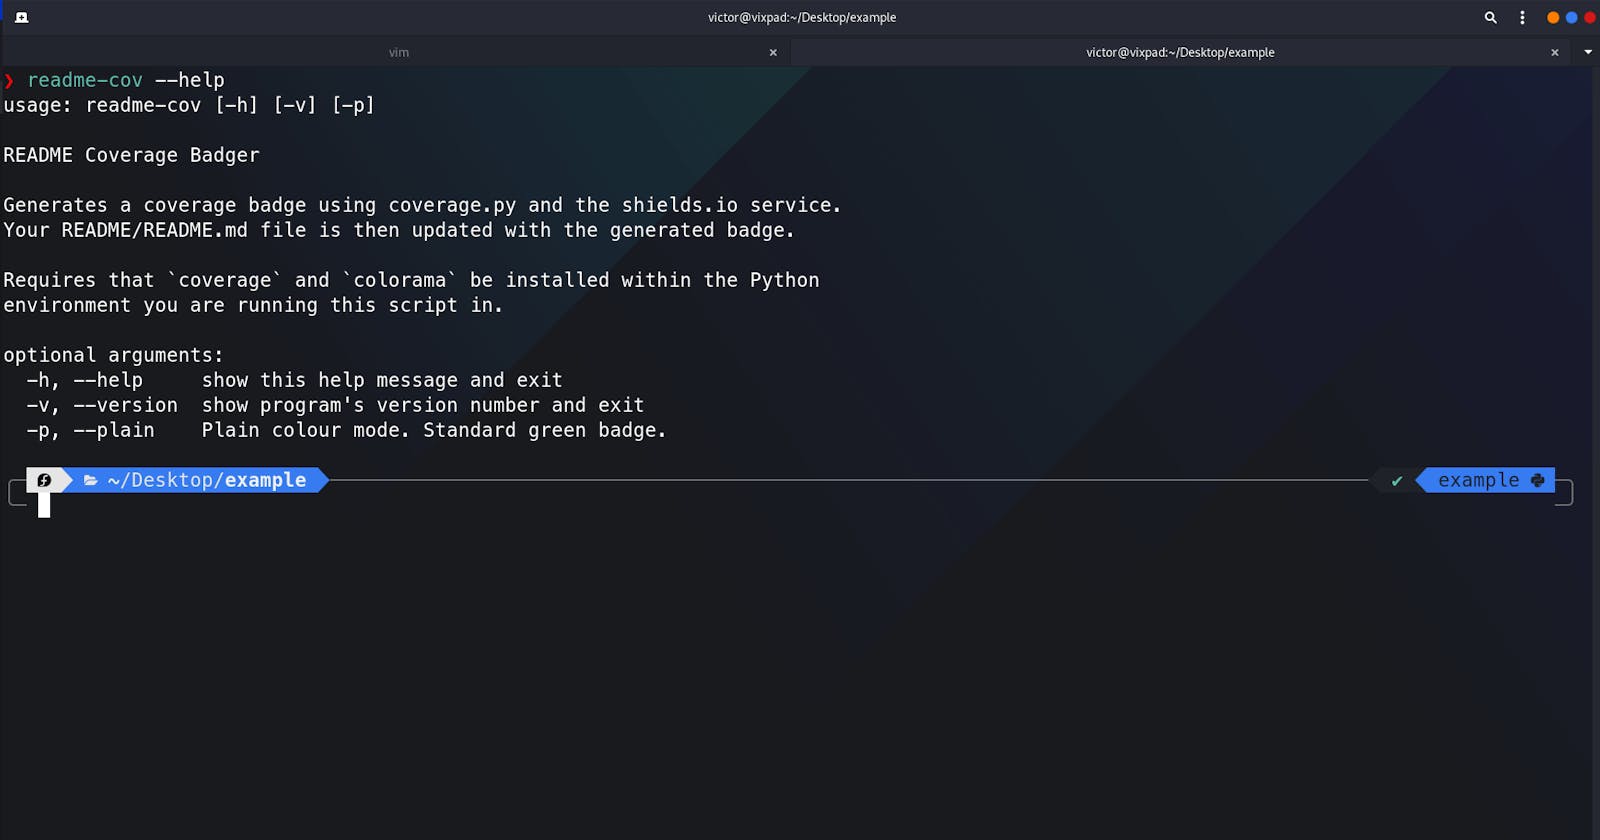
Initially, I wrote a python script for use on a specific project. This script would be placed in a scripts or utils folder in the project root, and, I would use npm scripts to make it easy to run the python script, like this
npm readme-cov
I thought to myself, "what happens when I'm working on another project? Am I going to have to be copying this script around from project to project? No way!" And so I decided to package the script and publish it to PyPI so that I (and others who might find it useful) can just pip install it and have it in your PATH within a couple seconds, ready for use.
The process
Packaging 101
At this point, I knew very little about python packaging, so I had to do a bit of digging to learn how it works and how I could package and distribute my project. To start with, I used audreyfeldroy/cookiecutter-pypackage as the base for my package. It comes with a lot of batteries included, and makes it easy to get up and running with a python package.
I also had a look at the official Python Packaging User Guide, maintained by the Python Packaging Authority (PyPA). Now, I've seen that many python projects have been using the setuptools way of packaging Python modules using a setup() function within a setup.py script. Even the cookiecutter template I was using had this setup. However, it is now recommended to use the PEP 517 approach – a pyproject.toml file and a setup.cfg file. This is the approach I settled for.
At this point, I was already familiar with pyproject.toml, having already used in in my projects to define configurations for black and commitizen-tools. However, using setup.cfg was new for me, but by reading the docs and seeing how other python projects used it, I was able to figure things out. You can have a look at the project.toml and setup.cfg files on the project's GitHub page.
I used PyPA build to build my package and generate a distribution:
python -m build
This created a dist directory in the project root, with two files:
❯ ls dist/
    readme_coverage_badger-0.1.0-py3-none-any.whl
    readme-coverage-badger-0.1.0.tar.gz
I found the following resources very helpful:
- https://setuptools.readthedocs.io/en/latest/build_meta.html
- https://packaging.python.org/key_projects/
- https://github.com/pyscaffold/pyscaffold/blob/master/setup.cfg
Some key takeaways:
- Previously, I would have multiple python configurations in my project root; one for Pytest, one for Flake8, one for Coverage and then of course
pyproject.tomlfor black and commitizen-tools. From this experience, I realized that I could ditch the former three config files and have the configurations defined insetup.cfg! This is great, now I can reduce the number of config files in my project! - I discovered that there are also other third-party tools one could use to package your python projects. One of the prominent ones is flit, which is used on the FastAPI project. Poetry uses
project.tomland has building and packaging capabilities.
Supporting multiple Python versions
Up to this point, most of my CI/CD workflows focused on one Python version. If I'm building something that I know will be used on a Python 3.8 server, why should I bother testing it on other Python versions? Well, if you're building something that will be used by not only yourself but also others and in different environments, you have to at least ensure that it actually works in different environments. Most Python projects these days seem to support at least Python 3.6 going up, so I also adopted this approach. For the first time, I learnt how to configure and use tox in my project.
I already had pyenv installed on my machine, with one or two python versions. I made sure I had Python 3.6 to 3.9 installed, and created a .python-version file in my project root with the details of the python versions I installed:
3.6.10
3.7.9
3.8.6
3.9.0
It was such a magical experience to see tox do its thing! Of course things didn't work right the first time, for instance, it took a couple of failures and Google searches to learn that I had to create the above .python-version file!
The cookiecutter template comes with a travis.yml config which uses tox-travis for seamless integration of tox into Travis CI. Even though different Python versions are covered, all of these are on a Linux machine. I wanted to setup a test suite that also runs on Windows and Mac OS. However, my initial attempts were unsuccessful and I temporarily gave up on this, incurring technical debt in the process (it's one of my TODO items on the project)!
Key takeaway:
- I learnt how to use
tox, a very powerful tool which, among other things, helps in checking that your package installs correctly with different Python versions and interpreters.
Uploading to TestPyPI, then PyPI
Before officially releasing your package to PyPI, it is recommended that you first test it on TestPyPI. After creating an account, I was able to upload my package to TestPyPI using twine:
twine upload -r testpypi dist/*
Running the above command uploads everything in your dist directory to TestPyPI. You'll be prompted for your username and password. In order to avoid the username/password prompts, you can define your package indexes configuration in a .pypirc file in your home directory.
I was able to see my project immediately on https://test.pypi.org, and even install as follows:
pip install -i https://test.pypi.org/simple/ readme-coverage-badger
In addition, I was able to
- see how the package's README is rendered,
- see whether I had correctly set the trove classifiers for the package.
As of June 2021, markdown checkboxes are not rendered at all on PyPI. They instead show up as a bullet followed by <input type="checkbox" disabled="" />, which is so annoying. Perhaps this could be one of the reasons why a number of packages maintain the use of restructuredtext for all forms of documentation. Even the README, CONTRIBUTING, AUTHORS and HISTORY files generated by audreyfeldroy/cookiecutter-pypackage are in restructuredtext format. Well, as of July 2021, I am more comfortable writing in markdown (Isn't this the same reason mkdocs was born, and why Material for MkDocs has gained popularity?). So, for now, it's README.md for me, and not README.rst!
After making corrections and rebuilding the package, I was ready to publish to the actual PyPI. So I went ahead and created an account at PyPI, then I uploaded my package:
twine upload dist/*
Side note:
The silly thing is that, while I spent time checking "secondary" things like text rendering, spellings, trove classifiers, etc., I didn't actually run my application after installing it from TestPyPI! I was comfortable with the fact that I had executed the application before building it, that I had written tests which passed and that I was able to install the app without encountering errors! But I never ran the application after building it! I only decided to do this after I had already pushed version 0.1.0 to PyPI, and to my shame, the app was broken:
ERROR: 06-Jul-21 22:02:03 There's no README.md or README at this location
INFO: 06-Jul-21 22:02:03 Run this in a directory containing either a README.md or README file
Wait a minute? What do you mean "there's no README.md ..."? I double-checked, and there was a README.md in the current directory. I went back to the code and discovered that the problem was in the way I defined the README location. I initially defined it using relative paths, and if you run the code from the project root, it works! However, this changes when you build the application, due to the notion of entry points. So, instead of using relative paths to define the README location, I used os.getcwd(), so that the script checks for the README file in the current directory, rather than checking for it in the script's directory's parent directory:
Buggy code:
def readme_location(filename: Union[str, str] = "README.md") -> Path:
    """Path to the README file"""
    current_dir = Path(__file__).resolve().parent
    parent_dir = current_dir.parents[0]
    readme_file = parent_dir / filename

    return readme_file
Fixed code:
def readme_location(filename: Union[str, str] = "README.md") -> str:
    """Path to the README file"""
    current_dir = os.getcwd()
    readme_file = os.path.join(current_dir, filename)

    return readme_file
Isn't the fixed code simpler and easier to read than the buggy one? Clearly, simple is better than complex!
After the bugfix and comprehensive testing to make sure that it actually worked, I released version 0.1.1, which is the current version at the time of writing this post.
Automating PyPI deployment
The Travis CI config that comes with the cookiecutter allows for automatic release to PyPI when you push a new tag to master. At this point, I was not very familiar with Travis CI, so I had to learn how to use it and configure it. The relevant section of the .travis.yml config is this one:
deploy:
  provider: pypi
  distributions: sdist bdist_wheel
  user: {{ cookiecutter.pypi_username }}
  password:
    secure: PLEASE_REPLACE_ME
  on:
    tags: true
    repo: {{ cookiecutter.github_username }}/{{ cookiecutter.project_slug }}
    python: 3.8
API tokens provide an alternative way (instead of username and password) to authenticate when uploading packages to PyPI
So I created an API token for the project, and set the username (user in the above config) to __token__ as per PyPI instructions. However, instead of putting the actual token in my config, I had to encrypt it:
# first, ensure that you have the travis Ruby gem installed on your computer
# see <https://github.com/travis-ci/travis.rb#installation> for detailed installation instructions
gem install travis --no-document
# then, you need to create a [personal access token](https://github.com/settings/tokens) on Github
# following the [Travis CI guidelines](https://docs.travis-ci.com/user/github-oauth-scopes/)
# you can now sign in to Travis CI
travis login --pro --github-token YOUR_GITHUB_PERSONAL_ACCESS_TOKEN
# now you can encrypt your PyPI API token
# the `--add deploy.password` option automatically updates the `travis.yml` with the encrypted string
travis encrypt YOUR_PYPI_API_TOKEN --add deploy.password --com
The good thing is, you can easily modify this configuration to upload to TestPyPI instead. This is done by adding server: https://test.pypi.org/legacy/ under the deploy section of the config.
I modified the config slightly by adding a before_deploy section in the Travis config, which run python -m build, just as I would if I was deploying manually from my computer
Automating GitHub releases
I decided to take things further and also automate the process of creating GitHub releases. Now, there are many ways to do this, including the use of GitHub Actions. However, since I was already using Travis CI, I decided to adopt a Travis solution, since Travis CI already comes with built-in deployment support for several providers.
The GitHub releases are tied to the PyPI deployment process. So, immediately after deploying to PyPI, I wanted to create a GitHub release. Travis makes it easy to upload to multiple providers. There's even a dedicated page in the Travis docs for each provider. It is highly recommended to use travis setup releases to automatically create and encrypts a GitHub OAuth token with the correct scopes. However, this somehow didn't work for me, (I also tried adding --com and --com --force but to no avail) so I went with the manual approach.
In order for automatic GitHub releases to work,
- I automated CHANGELOG generation using commitizen-tools and standard-version.
- I created an
invoketask calledget-release-notesto extract the latest content from the CHANGELOG, which is basically everything under the current tag.get-release-notessaves this content to a file namedLATEST_RELEASE_NOTES.mdin the home directory. - I added
invoke get-release-notesto thebefore_deploysection of the Travis config.
The complete .travis.yml file looks like this:
language: python
os: linux
dist: focal
python:
- 3.9
- 3.8
- 3.7
- 3.6
install:
- pip install -U tox-travis
- pip install codecov
script: tox
after_success:
- codecov
before_deploy:
- pip install -r requirements_dev.txt
- invoke dist
- invoke get-release-notes
- export TODAY="($(TZ=Africa/Lusaka date --iso))"
- export RELEASE_NAME="$TRAVIS_TAG $TODAY"
deploy:
  - provider: pypi
    distributions: sdist bdist_wheel
    user: __token__
    password:
      secure: ...
    on:
      tags: true
      repo: engineervix/readme-coverage-badger
      python: 3.8
    skip_existing: true
    skip-cleanup: true
  - provider: releases
    api_key:
      secure: "..."
    file_glob: true
    file: dist/*
    skip_cleanup: true
    edge: true
    name: $RELEASE_NAME
    release_notes_file: "$HOME/LATEST_RELEASE_NOTES.md"
    on:
      tags: true
      repo: engineervix/readme-coverage-badger
      python: 3.8
What next?
Well, this was quite an interesting experience, I certainly learnt a lot of new things, and I'm still learning and improving. Now that I've released my package and it's out there, I have to maintain it! One of the important maintenance tasks is to deal with security vulnerabilities and ensure that dependencies are up to date. I previously used Dependabot as the primary tool for this, but have since switched to renovate, not only because of the auto-merge feature (which GitHub's native Dependabot doesn't have, as of July 2021), but also because of the greater flexibility in terms of configuration.
I have given myself (and whoever wants to contribute!) additional challenges to improve the package, and I hope I can work on these and continue improving it.